3 Easy Saint Patrick's Day Craft Ideas for Kids
Share
March is here again, so that great, green holiday is upon us once more. Yes, it’s almost time for Saint Patrick’s Day once again. In true Pinwheel Crafts fashion, we are bringing you a list of fun diy arts and crafts projects to do with the kids. Whether they like shamrocks, leprechauns, or rainbows, we’re sure to have something for everyone under your roof. Without further delay, let's get into the ideas!
Leprechaun Flower Pots

Besides Saint Patrick’s Day, the month of March is also a signal that spring is just around the corner. With the beautiful warm weather that is on it’s way, it’s time to break out the garden supplies and get ready to get growing! If you want to get your kids excited for the holiday and growing season, creating a cute family of flower pot leprechauns might just be for you.
If you’re looking to keep this project simple, then we recommend our Pinwheel Crafts Flower Pot Kit. It comes with everything you need to create 3 adorable and unique flower pot designs, including these adorable little leprechauns.
You will need:
- 3 ceramic planter pots (terra cotta, or white)
- Paint in green, beige, orange, and black
- Paintbrushes
- Googly-eyes
- Paper, cardstock, or craft foam for the belt buckle
- Black chenille stems for the belt band
- Glue
- Glitter (optional)
Directions:
- If your pots are white, start by painting 2 of them green all over and the third beige. If you are working with terra cotta, or an older set of pots, you may want to sand and prime the pots with white paint or gesso. You can also make your green pots extra pretty by sprinkling them with glitter.
- Allow paint to dry for at least 20-30 minutes.
- Using the orange paint and a paintbrush, add a beard to the beige pot.
- With a pencil, lightly draw the preferred face on the pot.
- Stick on 2 googly eyes and add a nose, mouth, and eyebrows using black paint and a fine brush.
- Glue 1 or 2 chenille stems around the rim of the green pots.
- Cut out a rectangle from your paper, cardstock, or craft foam, then cut a smaller rectangle out of the middle (to look like a belt buckle).
- Glue the buckle onto the chenille stem belt band.
- One all the paint and glue has dried, you can fill them with candy or plants!
Shamrock Lantern

This adorable lantern is a great way to help your children create an adorable nightlight while also adding a touch of Saint Patrick’s Day to their bedroom decor. For these projects, we highly recommend our Pinwheel Crafts Fairy Jar Kit. You can also download our FREE shamrock templates to make the project a bit easier, too. Just download the image files and cut them out directly from the sheet, or use them as stencils to cut your shamrock shapes out of card stock, vinyl, or whatever material you want to use.
You will need:
- Mason jar and lid
- Mini fairy lights
- PVA glue and a paintbrush
- White craft tissue paper
- Glitter
- Decorative supplies for lid including ribbon, twine, fabric flowers, and more
- All the previously mentioned supplies are included in the Pinwheel Crafts Fairy Jar Kit
- Shamrock template (Find this in the Pinwheel Crafts FREE spring cutout downloads)
- Colored paper or vinyl sheets
- Any additional decorative paper and craft supplies you want to include in and on your lantern
Directions:
- Print out the Pinwheel Crafts FREE spring templates and cut out your favorite images. You can use the print outs directly, or as a template to cut out the shape from different material like card stock or vinyl.
- Glue your favorite cut out images to the inside of the fairy jar and make sure to allow the glue to dry for 10-20 minutes.
- Apply a thin layer of glue over the entire outer surface of the jar.
- Wrap your white tissue paper around the jar and press it on firmly to remove bubbles and wrinkles. Make sure to let the glue dry for 20-30 minutes before continuing.
- Once the glued tissue paper is completely dry, add an additional thin layer of glue to the outside of the jar with a paintbrush. Once thinly coated, lightly sprinkle glitter over the entire surface. You may want to add an additional layer of glue after the glitter has dried to help seal in the glitter and cut down on how much falls loose.
- While you are waiting for your glitter layer to dry, you can decorate the lid and handle on your jar by gluing whatever your favorite fairy or spring themed supplies and decorations are.
- Enjoy!
Shamrock Origami

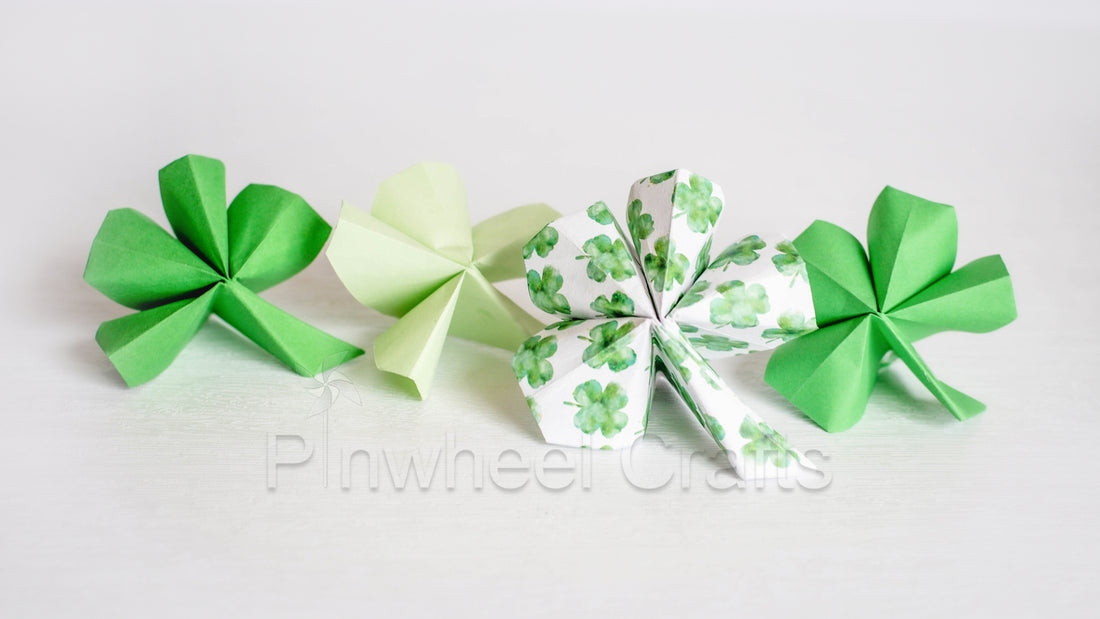
What’s better than finding shamrock and four leaf clovers? With the weather and temperatures being a bit unpredictable, making your own shamrocks can certainly beat getting out in the elements to find them in the wild. With our Pinwheel Crafts Paper Origami Kit, you can create your own shamrocks! Take a look at the 2 different shapes we created!
You will need:
- Origami paper in green, or a shamrock pattern
- Glue or Tape (optional)
- Green Pipe cleaner
Directions:
- Using four 4 x 4 inch squares of green paper, follow the steps provided in this video to create a four leaf clover. If you are feeling extra crafty, you can use double sided origami paper to add contrast, or even a cute button included in our kit!
- Use one 4x4 inch square of green paper, follow the steps provided in this video for a one of a kind shamrock!
Conclusion

Looking for even more fun Saint Patrick’s Day projects to do with the kids? Make sure to go back and check out our Saint Patrick’s Day post from previous years! Find great ideas for the Pinwheel Crafts Fun Fridge Magnet kit in our Saint Patrick’s round up from 2020, as well as some cute AND tasty ideas from our Saint Patrick’s round up from 2021. We have no doubt that there will be something there that will strike your child’s fancy.
Until next time, happy crafting!


