DIY Mother's Day Jewelry Using Household Items
Share

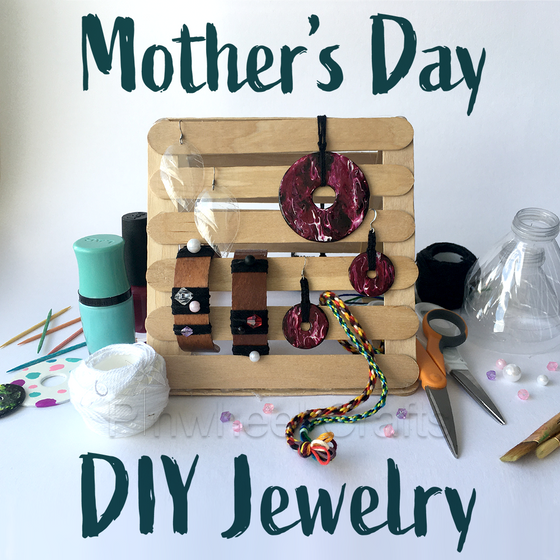
This week, we’re bringing you some last minute gift ideas for Mother’s Day using items you may already have laying around the house! If your mom loves jewelry and showing off how crafty her children and grandchildren are, look no further. We’ve brought you a handful of ideas to make a special item that she will cherish for years to come.
Tongue Depressor Bangles

This idea is simple, and very versatile. All you need are some wooden tongue depressors (also known as jumbo craft sticks) and whatever craft supplies you already have on hand. To shape the craft sticks, you will need to boil them in water for 12-15 minutes. Once they are thoroughly soaked and boiled, very carefully remove them with tongs and give them a moment until they are cool enough to handle. Very slowly and gently bend them into a “C” shape, then put them inside of a small mason jar, or cup to hold them in shape. You will need to let them cool and dry in the jar or cup for at least 3 hours, but we found the shape held best if we left them overnight.
Once the bangles are dry and rigid, you are ready to decorate! This part is completely up to you. You can use paint, paper and glue, glitter, gemstones, or even just a classy wood stain (just make sure to follow the directions carefully and use a sealer afterward). Use your imagination to make it specific to things your mom likes and she will be sure to love it!
Lacquer Pendants

If someone at your house is handy with tools, chances are good that they have a vast collection of things like nuts and bolts. Check with them to see if they have any metal washers that they can spare. Once you have the washers, you can use whatever nail polish you have on hand to decorate the washer to your mom’s design sensibilities.
To add finer details, try using toothpicks. They hold nail polish well and are easy to dispose of, so you don’t have to worry about ruining any art tools with hardened nail polish. You can also use craft supplies like glitter, rhinestones, buttons, and more to add a little extra flare to the pendant. While working, it’s a good idea to prop up your pendant on short stilts. We found a couple small pieces of modeling clay worked really well. By keeping it off of a flat surface, you reduce the chance of developing jagged edges from the lacquer drying between your washer and work surface and then breaking when you lift it up. We also recommend using a clear coat to seal everything, but that isn’t necessary.
If you find yourself having a difficult time making intricate patterns, we recommend a simple marbling effect. Take 2-3 complementary, but contrasting colors of polish. Add thick dribbles and drops using either the polish applicator, or by gently pouring it onto the pendant. Once you have a lot of polish globbed on, use a toothpick (or two) to drag the lacquer around into a swirly, marbled look.
Once you have your pendant complete, use whatever craft string you have to loop around the washer. You can use anything from leather strips, to ribbon, to hemp, or even yarn, if that’s all that is available to you. We’re sure whatever supplies you use, you mom is going to love her new necklace.

Plastic Feather Charm Earrings

If your mom is all about recycling, then we highly recommend repurposing plastic bottles into beautiful, feather earrings. This one does require some jewelry supplies, but you can improvise by using hooks from an old or damaged pair of earrings, or even paper clips (if your mother doesn’t have a nickel allergy).
To make these feather charms, simply cut out multiple leaf shapes from an empty plastic bottle. (We’ve included a small pattern for you to use if you need a little help getting the perfect leaf shape.) While we have used clear bottles for our example, you can use whatever color is available to you. Once you have cut out the leaves (2 for each earring), use your scissors to cut tabs along the sides. A small hole punch or awl is perfect for puncturing a small hole at the top of the leaf. You can use this hole to attach two leaves to each hook.
Viola! A beautiful, almost ethereal pair of earrings!

Woven String Bracelet

For the friendship bracelet fans out there, this is a great option if you have embroidery thread lying around. You will need to cut a four to six inch cardboard circle with a half inch hole in the middle. Cut eight notches around the outside at equal distance from each other. Now, choose seven colors you want to use for the bracelet (hint: you can use less colors, just make sure you include seven strands total). Tie all the strands together and weave them through the center hole of the cardboard loom.
Now, take each strand and pull them to their own notch on the outside of the loom. Working from the empty notch, move three notches counterclockwise. Move this strand to the empty notch. Repeat this step starting from the new empty notch. Continue following this pattern until you have a bracelet of the desired length (it will be coming together through the center hole out of the bottom side of the cardboard loom).
If you don’t have embroidery thread, don't fret! This works with a variety of different materials. You can use yarn, cord, hemp, or even ribbon. Whatever material you use, we know your mom will be so happy that you took the time to make something for her.

And, if all else fails, there's still time to order the Pinwheel Crafts Pendant Jewelry kit and make a custom necklace for your mother. Whatever you decide to do to show your appreciate for such an awesome woman, we wish you and your family health and happiness this Mother's Day.
Happy crafting!
Pinwheel Crafts


